Our guide and photographer Bernódus (@bernophotography) wrote down a list of tips that he thinks will come to a good use while photographing onboard.
Composition
As you probably know, composition is key. That being said, photograping from above does not compliment the enormous whale. Shooting from the crows nest makes the whale appear smaller that if you stay on the boats deck so we recommend staying there. Which leads us to our next point
Positioning
While being at the front might seem the most sensible thing to do, it’s also the most popular spot. But you’re out there to get in some amazing frames of the whales and you will need a little space to move around. Thus our photographer Bernódus (@bernohotography) recommends staying at the back of the right hand side on the boat. The captain will most often need to turn the boat so he sees the whale clearly for all safety, and if it happens that he’ll choose to have the whale at the left hand side, it will only take 5 seconds to change.
Stay Calm
One thing that I see a lot of excited people do is panicking and just shoot bursts to try to get the perfect frame. It’s perfectly understandable but my tip is to stay calm. Unless you got a very good camera, it wont have a high enough frame rate to get the frame you want that way. We recommend getting the focus right as you want it and then shooting a few frames just like you want them, instead of hoping that the camera captures it right. When the whale comes up for a breath, you have approximately 1-2 minutes before it lifts its tail for a deep dive, and even when the tail starts lift, you’ll have a few seconds to get your zoom and focus right.
Manual – Aperture Priority mode (Av)
While I would in almost all situations recommend the Manual mode as it opens doors to photographing in new ways I wouldn’t recommend it while out there. With constant changes in light and the clouds moving around, it’s difficult to be always looking at the built-in meter to decide on aperture and shutter speed. Instead I would recommend the aperture priority mode, setting your ISO as high as you trust your camera to handle (without noise creeping in), and then setting your aperture as high as the lightning allows (A high aperture will reduce the damage if you don’t get the focus on point) . A good rule of thumb is to never let the shutter speed get lower that 1/2000s as you will risk having your photos shaky.
Al Servo focus
Setting the focus to Al Servo mode is crucial when photographing whales or any moving object. Then the camera will focus as fast as it can without you having to constantly push the AF button.
Shooting Jpeg
“Who is this guy to tell me to shoot jpeg, I’m all RAW”
Well, having worked a lot with my old Canon 600D I can for sure say that when I decided to try jpeg when I needed to take a lot of frames was a good decision. Of course I tried to use RAW as much as I could but when the situation got tricky (f.ex. when a Humpback breaches) and I needed a lot of high speed frames, I realised that my old camera could only shoot 6 raw frames in a row before needing a little break to write the images. So if you experience this problem with your camera, switch instantly to jpeg.
What about retouching?
Well my experience is that if you get the photo right in-camera, the little detail editing will not be hard even though it’s a jpeg!
Comparison
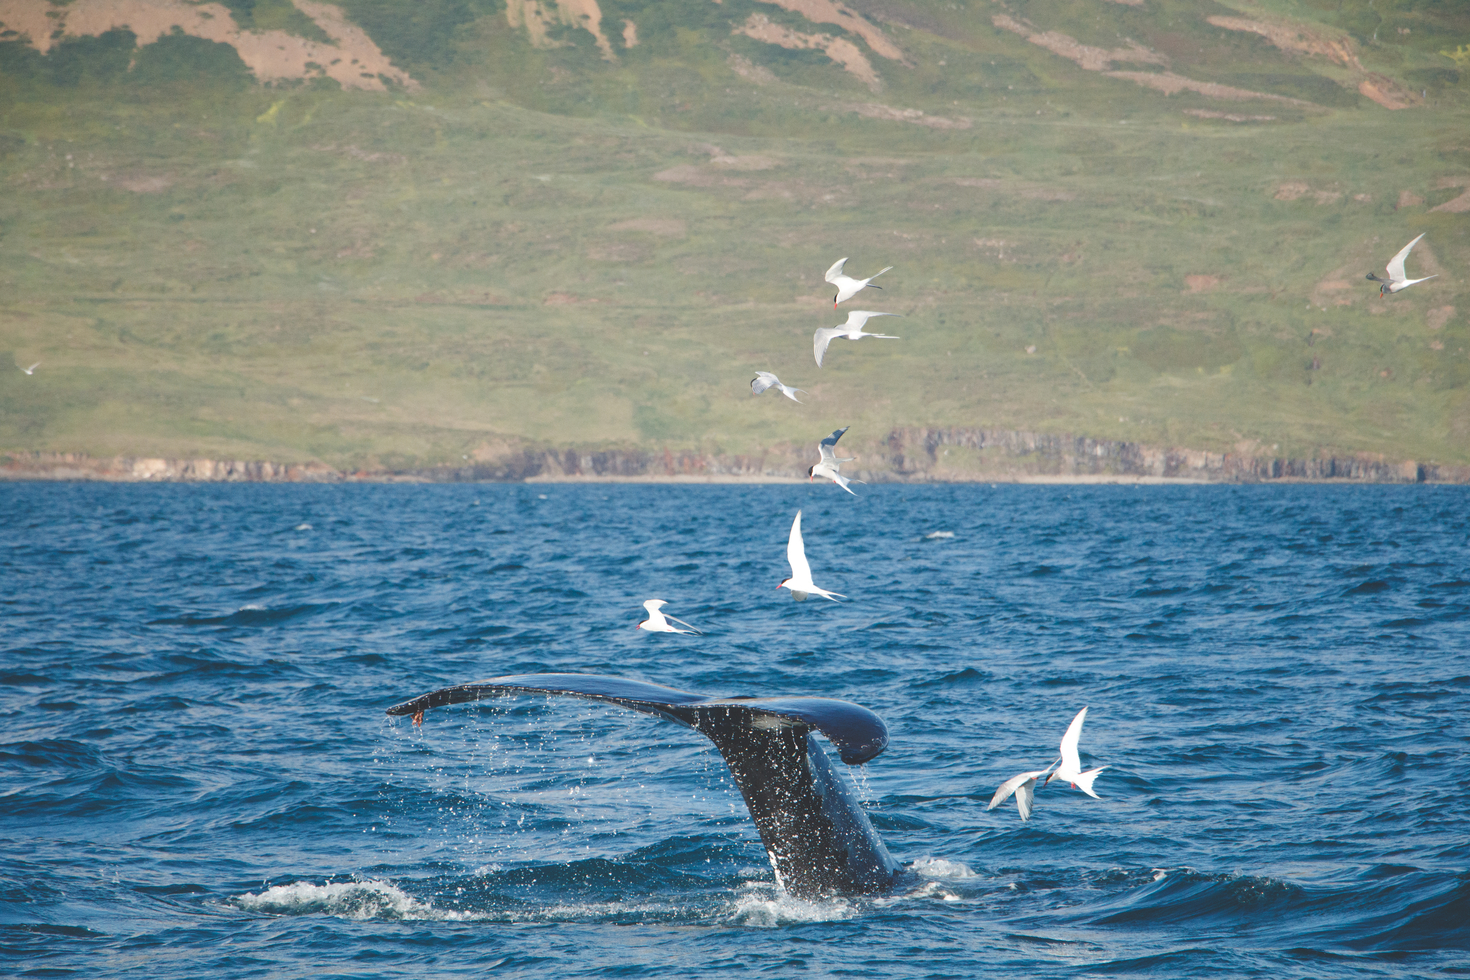
This tip is a one I love. Often you’ll have the luck to have birds all around, getting one in your frame for comparison to the whale is really fun to underline the size of the whales. But when the birds just don’t go into the frame you can get really creative, putting people inside the frame or even holding some things in front of the camera (if your lens is wide enough)!

Here I went down low and also got lucky enough to have the Arctic Terns flying around
Monopods
Sometimes I see people bring tripods onboard, well that’s kinda useless.. Buuuut the thing I could recommend in some cases is bringing a monopod – Specially if you got a big camera body and a big lens, it will be useful just to keep your hands fresh and non-tired, because tired hands are shaky hands.
Auto White Balance
Modern DSLR cameras have a very good AWB so theres no shame in using that when in these conditions. Of course for creative shots when you have the time to play around, playing with the white balance is all good. But when you only have this opportunity to photograph the whales, getting the white balance incorrect would be really frustrating.
Lenses
This is a common question and the answer is: Just take the whole camera bag! Given that you don’t carry more than 3 lenses, you can take your camera bag – with the lenses, onboard. You can keep it inside the steering house and then take it out and switch lenses later on! It’s crucial on a trip like this to have options – If you got a good zoom lens (100-400mm, 70-200mm) that would be ideal for the first minutes of the tour but then when we get closer it’s great to be able to grab a wider lens (24-70mm, 18-135mm, 24-105mm).
Filters
I see a lot of people that have ND filters on their lenses and I kinda don’t understand why. My recommendation is to skip filters that require you to slow down your shutter speed, you’ll want the aperture high and the shutter speed high too to get crystal clear, razor sharp photos!
Note: A polarizer would maybe be fine on a very sunny day to cut down the sun – reflection from the ocean.
No Auto programs
While I did preach the Aperture priority and Auto white balance. That’s where I draw the line, auto modes like Program or Fully Auto will not work if you want good photos of the whales. When you put something on auto you lose control over it and you’ll want to control your shutter speed to make sure your photos are sharp enough! (And auto ISO is off-limit!)
That’s it! I hope you can use these tips while on your whale watching trip!
If you want to see my photos you can check any of my social media accounts:
https://www.facebook.com/whales.is/
https://www.instagram.com/whales_hauganes_iceland/
and most of the pictures posted to Whale Watching Hauganes social media profiles are by me! (not all though)


